|
 When you add directories on your computer to be monitored by the Grabber for new documents, you must define their properties and the properties of the documents you want to capture. The next procedure is the continuation of the procedure in section Adding Monitored Directories and Instruments to the Grabber. When you add directories on your computer to be monitored by the Grabber for new documents, you must define their properties and the properties of the documents you want to capture. The next procedure is the continuation of the procedure in section Adding Monitored Directories and Instruments to the Grabber.
>> To define grabber-monitored computer directories
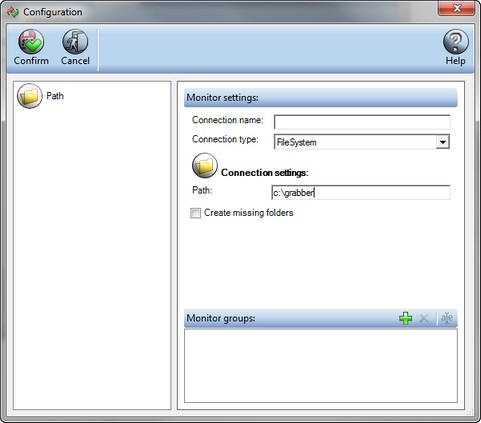
| 2. | In the Monitor Settings field group, fill in the following fields: |
| • | Enter a name for this connection configuration in the Connection name field. |
| • | Select the type of your connection to the system from the Connection type drop-down list. |
| • | Enter specifications for your connection in the Connection settings field group. These fields vary according to your connection type. For example, for a FileSystem connection, enter the network/local path which the Grabber will monitor in the Path field. Marking the Create missing folders option will create the directory path if it does not exist. |
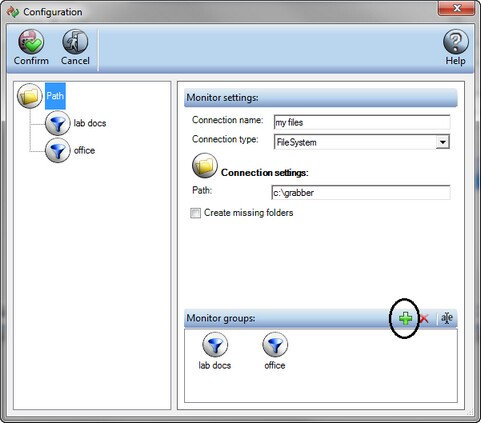
| 3. | Click the Add group  icon in the Monitor groups field, and type a descriptive name under the newly created group icon; the new group appears in the left-side pane of the Configuration window as a tree branch of your grabber-monitored directory path. icon in the Monitor groups field, and type a descriptive name under the newly created group icon; the new group appears in the left-side pane of the Configuration window as a tree branch of your grabber-monitored directory path. |
| 4. | Select the group branch from the left-side pane of the window, and click the Add Pattern  icon in the Patterns field to add patterns for file recognition by the Grabber. Type a file pattern according to which the Grabber will capture documents (i.e., *.* for uploading any type of file). For further information, see section Rules for Writing File Group Patterns. icon in the Patterns field to add patterns for file recognition by the Grabber. Type a file pattern according to which the Grabber will capture documents (i.e., *.* for uploading any type of file). For further information, see section Rules for Writing File Group Patterns. |
| 5. | Optionally, mark the Maintain Entry Order check box to maintain entry points of documents according to the indicated pattern rules. For example, if the "*.docx" pattern is set to be first and *.xlsx is set to be second, the SDMS Grabber will wait for these patterns to be received in the correct order and only then it will upload them. If the files are received out of order the grabber will not process them. |
| 6. | In the Upload information field group, fill in the following fields: |
| • | To associate the uploaded file(s) of the selected file group with a specific data recognition template (DRP) template, select a DRP from those listed in the Pattern drop-down list. |
| • | From the Project drop-down list, select the project with which you want to associate the grabbed files of the selected file group. Mark the Prompt option if you want the system to prompt the user to select a project for a grabbed file. |
| • | From the Filetype drop-down list, select the file type with which you want to associate the grabbed files of the selected file group. Mark the Prompt option if you want the user to be prompted for File Type for a grabbed file. |
| • | In the Keywords table, enter the keywords/values to appear in the UXML template of the grabbed files of the selected file group. For more information about UXML containers and the output XML, see section Unified XML. Mark the Prompt keywords option if you want the user to be prompted for Keywords for a grabbed file. |
| 7. | In the After upload field group, fill in the following information: |
| • | Mark the required action for the selected file group: None, Delete or Move. None means "do nothing", the document will remain in the folder. Delete means that the Grabber will delete the document from the monitored folder after uploading, and Move means the Grabber will move the document to a local or network storage, that you can specify in the Destination path field. |
| • | If you want the Grabber to process read-only files, mark the Handle readonly files check box. |
| • | If you elected to move the captured documents to a specified location, you can set the rules for grouping them, by marking the Group files check box. Then, from the Folder structure drop-down list, select the pattern according to which the grabbed documents will be stored in folders: by month, by hour, by day, or by week. If you selected Weekly, make sure to choose the day which will begin the week in the Fist day of week drop-down list. |
| • | From the Overwrite action drop-down list, select the action to be undertaken by the system when the grabbed document will encounter a document with the same name in the folder: Replace, Don't move, or Rename new file. |
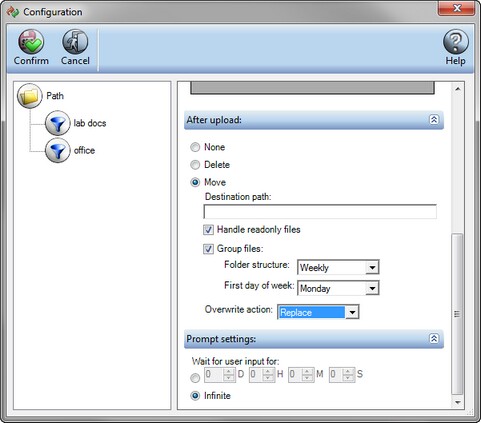
| 8. | In the Prompt settings field group, mark the Wait for user input for option and specify the time by which the system will prompt for Grabber time-out. Alternatively, mark the Infinite option. |
 TIP Typically SDMS Grabber starts when the user's computer is turned on. You can also start or restart the grabber service on user computers using the Control Panel > Administrative Tools > Services dialog box to start Grabbers immediately after configuring them. However, it is highly recommended not to do it from the Services.msc Windows dialog box.The user should interact with this dialog box only if there are problems relating to the service (system wake up after sleep mode). TIP Typically SDMS Grabber starts when the user's computer is turned on. You can also start or restart the grabber service on user computers using the Control Panel > Administrative Tools > Services dialog box to start Grabbers immediately after configuring them. However, it is highly recommended not to do it from the Services.msc Windows dialog box.The user should interact with this dialog box only if there are problems relating to the service (system wake up after sleep mode).
|