![]() Before starting to use the Grabber, you have to define from which directories to capture files on your computer, and to connect medical instruments that will send data to the system. The Grabber will capture all newly created files according to your definitions described below, and will save them directly into SDMS.
Before starting to use the Grabber, you have to define from which directories to capture files on your computer, and to connect medical instruments that will send data to the system. The Grabber will capture all newly created files according to your definitions described below, and will save them directly into SDMS.
>> To add grabber-monitored computer directories / instruments
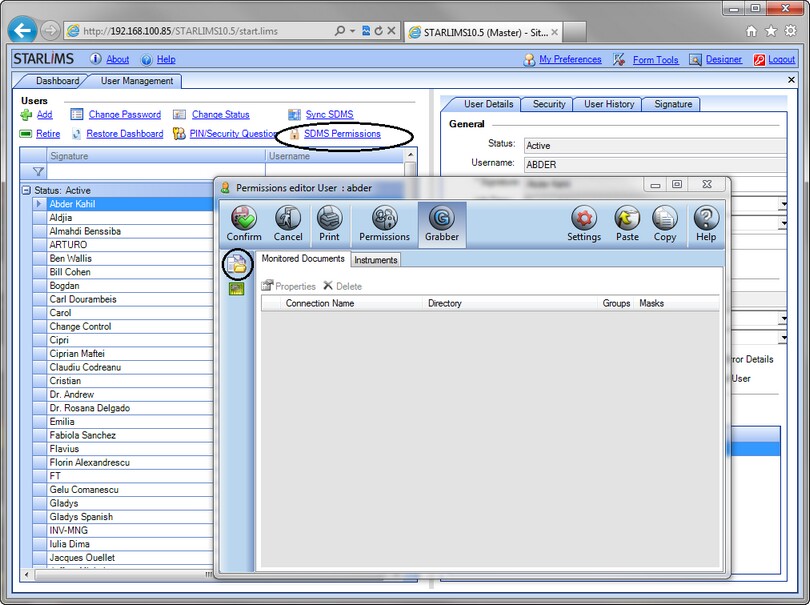
| 1. | Log on as a user with access to Utilities > User Management and open that branch. |
| 2. | Highlight a username to administer the SDMS Grabber(s). Click on the SDMS Permissions link to launch the Permission Editor window. This window allows you to assign user permissions and to configure the SDMS Grabber configuration. |
![]() NOTE These settings are applied for the selected user, only. The Grabber is installed on this user's computer that contains grabber folders. That does not mean, however, that the grabber is limited to a local resource only. For example, the grabber service can run on a local machine within the Intranet but monitors directories on a remote/external storage, or from an FTP server.
NOTE These settings are applied for the selected user, only. The Grabber is installed on this user's computer that contains grabber folders. That does not mean, however, that the grabber is limited to a local resource only. For example, the grabber service can run on a local machine within the Intranet but monitors directories on a remote/external storage, or from an FTP server.
| 3. | Click the Grabber button to view the grabber monitored documents for the selected user. |
| 4. | To monitor directories on a specified computer, click the Add computer |
| 5. | To add an instrument, click the Add instrument |
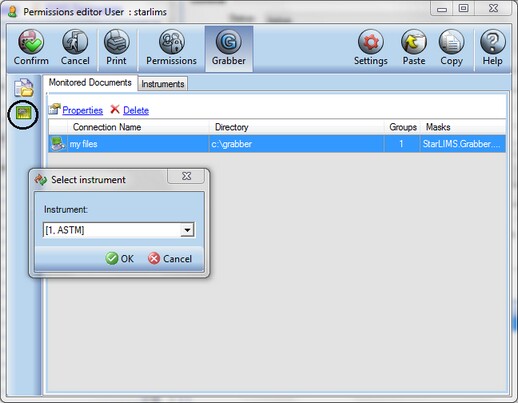
| 6. | Click OK; the selected instrument's Configuration window appears. For information about configuring the connected instrument (as a continuation of this procedure), see section Defining Connected Instruments. |