![]() Storage Policies are very similar to regular workflows, except that they control document retention and storage locations. Storage policies are used to destroy controlled information after a predefined time frame (typically seven years for regulated environments), moving documents to a different storage location (for example, moving documents older that 1 year to slower storage), or changing properties of groups of documents based on a predefined time span.
Storage Policies are very similar to regular workflows, except that they control document retention and storage locations. Storage policies are used to destroy controlled information after a predefined time frame (typically seven years for regulated environments), moving documents to a different storage location (for example, moving documents older that 1 year to slower storage), or changing properties of groups of documents based on a predefined time span.
Storage Policies are constructed very much like any other workflows, so they can contain a full approval process involving different users and triggers. The main difference between a regular document workflow and a storage policy is that instead of the Creator stage as an entry point, Storage Policies have a File Filter stage, which defines the group of documents the policy is applied to, based on various search criteria and/or time span. The final File Policy stage is where you define the Policy Action.
Policy Action is the action the system applies to the documents that match the filter in File Filter. Documents can be deleted, shredded, or moved to a different storage provider.
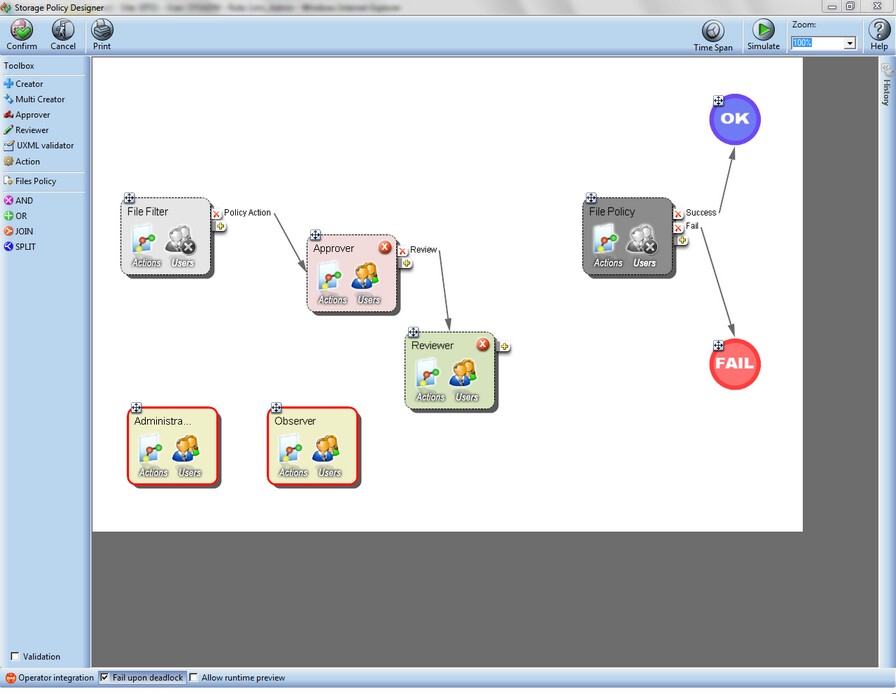
The Storage Policy Designer window allows you to manage a storage policy using graphical objects. To add task boxes or logic operators, you click on one of the tasks or operators in the Toolbox pane, and then click again inside the Storage Policy window. To launch the Storage Policy Designer window, open the application at path Utilities > SDMS Admin. Click on the Storage Policies tab, then click Add or Edit to create a new storage policy or edit an existing one, respectively. For detailed configuration information, see the next section Configuring Storage Policy Template.
Storage Policy Stages
Stages are depicted as squares in the Storage Policy window. Use the following information to configure the steps, which are represented by the task boxes in a storage policy workflow. For detailed configuration information, see the next section Configuring Storage Policy Template.
Stages have unique properties, which are identical to the properties of regular workflow stages. For information about workflow stages, see section Workflow Designer.
Predefined Workflow Stages
Predefined stages for storage policy workflows are very similar to those of regular workflows. For explanations about predefined stages Creator, Mutli Creator, Approver, Reviewer, UXML Validator, Action, Administrator and Observer, see section Workflow Designer.
File Filter - This is typically the initial step of a storage policy workflow, where a file filter is created, allowing the system to determine to which documents to apply this storage policy. Clicking on the filtering ![]() icon inside the File Filter action box opens the following filtering options:
icon inside the File Filter action box opens the following filtering options:
| • | Flags - Allows you to select documents' flags according to which the system will filter the documents for application of this storage policy. |
| • | Recognition statuses - Allows you to select documents' recognition statuses according to which the system will filter the documents for application of this storage policy. |
| • | Time Span - Allows you to select documents according to the time period they exist in SDMS. Select the relevant option or type the needed time period in the Custom (days) text box. For example, choosing the Seven years option will apply this storage policy to all documents that exist in the system for seven years. Or, you can type 200 in the Custom (days) text box, and the storage policy will be applied to the documents that exist in the system for (at least) 200 days and more. Note that seven years is the longest the document is allowed to stay in the system before being exported to a storage directory according to its storage policy. |
| • | Multi Selection - Allows you to select multiple options from the additional filters described below. For example, when setting a Users filter, marking the Multi Selection option will enable selecting more than one user from the list of users by holding <CTRL>. |
After setting these basic filters, click on the Add Filter button to add more filters to your storage policy action. Note that you can go back to your previous selections by clicking the ![]() button, and forward by clicking the
button, and forward by clicking the ![]() button. The following are the additional filters:
button. The following are the additional filters:
| • | Projects - Allows you to select documents' project(s) according to which the system will filter the documents for application of this storage policy. |
| • | File Types - Allows you to select documents' file type(s) according to which the system will filter the documents for application of this storage policy. |
| • | Users - Allows you to select user(s) who created the documents, according to which the system will filter the documents for application of this storage policy. |
| • | Refresh - Refreshes and applies your selections. |
| • | Remove All - Removes all your selections. |
After setting the filter, select the stage in the storage policy workflow to which the document moves after an action is taken by the user from the On policy action drop down list, and specify a name of the stage, if needed, in the Custom Name box.
File Policy - This is typically the final step of a storage policy workflow, where the policy action is defined, which will be applied to the documents answering the filtering criteria set at the File Filter stage. The actions available at this stage are described under the Action stage in section Workflow Designer.
Time Span - This Time Span button situated at the (top) task bar of the Storage Policy window is not to be confused with the Time Span option in the File Filter action box. Click the Time Span button to define when the storage policy is to be executed, and select the relevant option or type the needed time period in the Custom (days) text box. For example, if you select Seven Years, this storage policy will be executed the moment you click Confirm, and then after seven years, to the documents that match the filtering criteria defined in the File Filter.
Logic Operators
Actions can be added and then linked to other stages with either arrows or logic operators. The available logic operators are described in section Workflow Designer.