![]() SDMS allows you to capture messages sent from medical instruments, such as reporting patient test results. Instrument messages vary according to the type of tests performed. After the messages are captured by the Grabber, the system translates the messages into an XML format which is readable by the users of the LIMS systems. For more information about instrument message translation, see section Instrument Protocol Translation Objects.
SDMS allows you to capture messages sent from medical instruments, such as reporting patient test results. Instrument messages vary according to the type of tests performed. After the messages are captured by the Grabber, the system translates the messages into an XML format which is readable by the users of the LIMS systems. For more information about instrument message translation, see section Instrument Protocol Translation Objects.
Before adding instruments to the Grabber, make sure the instruments and their translation objects are defined in the system. For information about adding instruments to SDMS, see section Instruments Inventory. The next procedure describes how to configure the instruments you have connected to the Grabber and is a continuation of section Adding Monitored Directories and Instruments to the Grabber.
>> To define grabber-monitored instruments
| 1. | Perform Steps 1 - 6 of the procedure in section Adding Monitored Directories and Instruments to the Grabber; the selected instrument's Configuration window appears. |
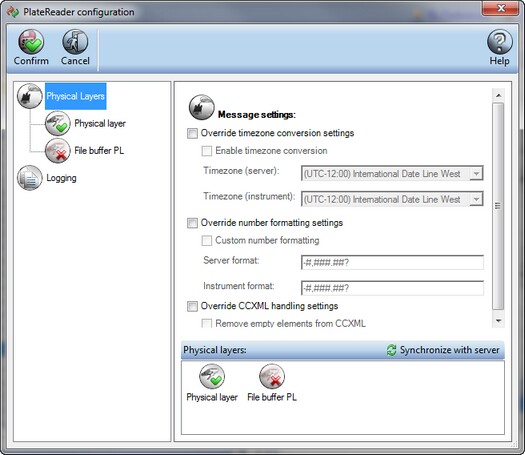
| 2. | On the left-side of the window, click Physical Layers to view the instrument's physical layers' connection settings. You can configure the following instrument message settings here: |
| • | Mark the Override timezone conversion settings and Enable timezone conversion check boxes and select the instrument's and your computer's time zones in the respective fields. |
| • | Mark the Override number formatting settings and Custom number formatting check boxes and select the instrument's and your computer's numbering formats in the respective fields. For more information about numbering formats in SDMS, see section Designing Number and Date Time Nodes. |
| • | Mark the Override CCXML handling settings and Remove empty elements from CCXML check boxes to manage your CCXML. For more information about the CCXML format, see section Instrument Protocol Translation Objects. |
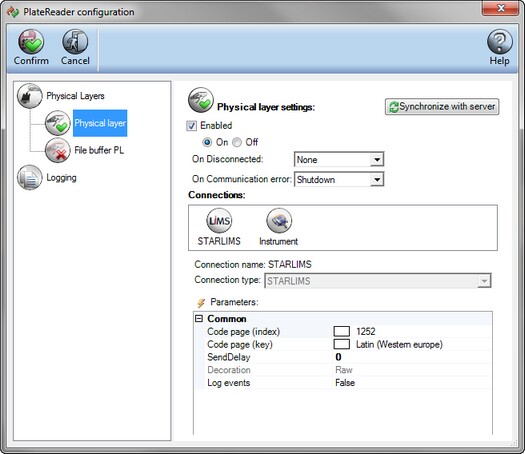
| 3. | Click on the relevant physical layer name on the left-side pane of the window to define its connection properties. The instrument's connections are also added in the Physical layer tab of the Protocol Designer window. For more information, see section Designing Protocol Physical Layer. |
![]() NOTE Defining instrument's connection settings requires special technical knowledge. Only a specialist familiar with protocol connection types and with the specific instrument's properties should adjust these settings.
NOTE Defining instrument's connection settings requires special technical knowledge. Only a specialist familiar with protocol connection types and with the specific instrument's properties should adjust these settings.
| 4. | Click Synchronize with server to copy the instrument configuration from the Grabber to SDMS, that is, to synchronize the settings with the Translation Object. For more information about translation objects, see section Instrument Protocol Translation Objects. |
| 5. | To enable editing the connection parameters of the physical layer, mark the Enabled check box and click the On radio button. |
| 6. | In the Connections field, select the relevant connection type. STARLIMS supports a number of internationally used connection protocols. The Parameters field below displays the parameters of the selected connection type. |
| 7. | In the Parameters field group, enter the relevant protocol parameters. |
| 8. | To configure the logging options for your instrument communication, proceed as described in the next procedure. To finish, click Confirm. |
>> To configure logging options for an instrument
| 1. | After defining the instrument connection properties as described in the procedure in this section above, on the left-side pane of the instrument's Configuration window, click Logging to configure logging settings for the instrument. The logging configuration enables/disables Grabber Logs. In addition, it allows you to set some parameters that govern how the Grabber will generate the logs. |
| 2. | Mark the Enable logging option, and specify the path of the future logs in the Path field. Mark the Create path option if you want the system to create the logs path in case it does not exist. |
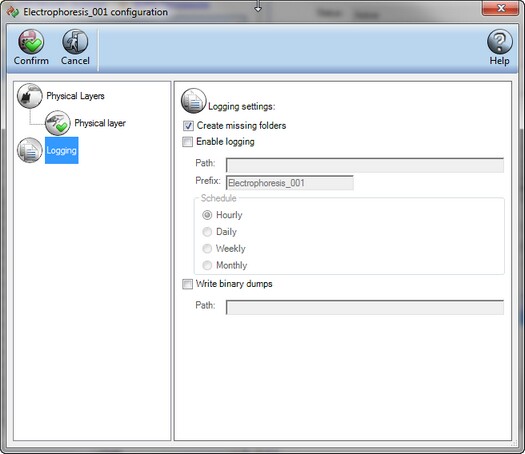
| 3. | In the Schedule option group, select how often you would like to create logs for that instrument's activities. |
| 4. | Select the Write binary dumps check box to save traced log files in a local folder, and specify the folder's path in the Path field. |
| 5. | Click Confirm. |