![]() You can use the Incoming Queue application to manually upload files. During the upload you can define the file's properties such as associated file type, enforce a DRP template, and more.
You can use the Incoming Queue application to manually upload files. During the upload you can define the file's properties such as associated file type, enforce a DRP template, and more.
![]() NOTE You can use the same feature in the Documents application where it can be accessed using the Upload file button.
NOTE You can use the same feature in the Documents application where it can be accessed using the Upload file button.
>> To manually upload a document into SDMS
| 1. | Log on as a user with access to Life Cycle Options> SDMS> Incoming Queue and open that branch. |
| 2. | Click the Upload link to launch the Upload Files window. |
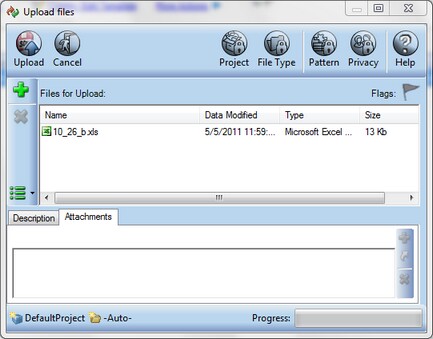
| 3. | Click the Add |
| 4. | If you want to restrict the access to the selected file(s) to a specific team, click the Privacy button, mark the Force Team Privacy check box, and select the team to which you want to assign access. Click Apply to confirm your selection. The file will be visible only to the selected team. Please note that you must be a member of the team to see it in the selection window. |
![]() NOTE If the Privacy button is disabled, it means that the team privacy function has been disabled by the administrators. Note that enabling this function may considerably reduce the system performance.
NOTE If the Privacy button is disabled, it means that the team privacy function has been disabled by the administrators. Note that enabling this function may considerably reduce the system performance.
| 5. | If you want to associate the uploaded file(s) with a data recognition template (DRP), click the Pattern button, mark the Force Pattern check box, and select a data extraction method. Click Apply to confirm your selections. |
![]() NOTE If you want to enforce the system to process the document according to a specific DRP template, the user should use this feature. In addition, if there is an FRP template to a given document but the user explicitly selects a different file-type, the user selection is to be performed. The system will not move the document to a different file-type accordingly.
NOTE If you want to enforce the system to process the document according to a specific DRP template, the user should use this feature. In addition, if there is an FRP template to a given document but the user explicitly selects a different file-type, the user selection is to be performed. The system will not move the document to a different file-type accordingly.
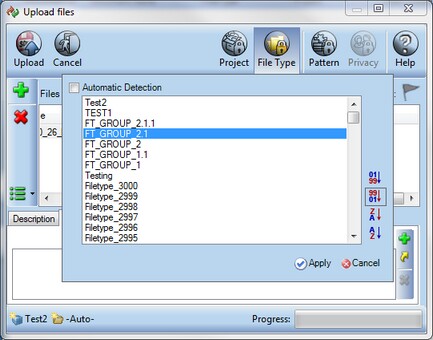
| 6. | Assign a project and a file type to the document using File Type and Project buttons. If none are selected, the document(s) are assigned a default project, and the file type is chosen by the recognition template that the document matches. If you select a file type for which advanced parsing is disabled, you might be prompted to manually enter some keywords/metadata to the documents. Click Apply to confirm your selections. For more information about manual keyword prompts, see sections File Types and Unified XML Designer. |
| 7. | If you want to add attachments for a selected document such as image files, click on the Attachment tab, then click the corresponding Add button and navigate to the relevant file(s). You can also add references to the file, which are documents that already exist in the SDMS repository. Click the Reference button, and navigate to the file to which to refer: |
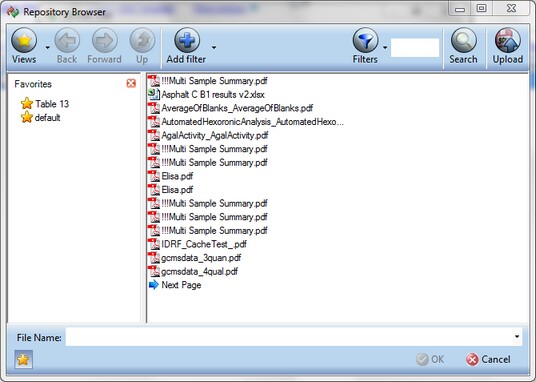
![]() NOTE You can use the SDMS filtering options to locate the relevant files. For explanation about using SDMS filters, see section Managing Documents.
NOTE You can use the SDMS filtering options to locate the relevant files. For explanation about using SDMS filters, see section Managing Documents.
| 8. | To remove selected attachments or references, click the corresponding Remove button. To manually enter description for a selected file, click on the Description tab, and type your description. If none is provided, the system will attempt to generate one automatically, which will usually be the first couple of lines from the document. |
| 9. | Click Upload. The files will be uploaded one after another, with the status of the upload (for example, the green icon for successful upload). |
![]() NOTE Limitations on upload sizes and other policies can be applied by the system administrator.
NOTE Limitations on upload sizes and other policies can be applied by the system administrator.