![]()
![]() After a file recognition pattern and a data extraction method are created, internal objects in the parsed document need to be bound to a Unified XML. Unified XML output requires a predefined template that the output of the document will fit into. For information about how to create a Unified XML template, refer to the Unified XML section in the SDMS Administration Tools chapter.
After a file recognition pattern and a data extraction method are created, internal objects in the parsed document need to be bound to a Unified XML. Unified XML output requires a predefined template that the output of the document will fit into. For information about how to create a Unified XML template, refer to the Unified XML section in the SDMS Administration Tools chapter.
>> To bind extracted information to unified XML
| 1. | To bind extracted information to a unified XML, click on the Export wizard tab and select an output template from the predefined UXML templates. After selecting the UXML template, a list of required fields is displayed. |
![]() NOTE If advanced features are required, such as in the case of cross tab result tables, select an existing action script or create one that uses this feature.
NOTE If advanced features are required, such as in the case of cross tab result tables, select an existing action script or create one that uses this feature.
| 2. | To create an action script, click on the Edit Action Script button to launch the Action Script Designer window. This designer allows advanced users that are familiar with Jscript code to write code to be used by SDMS. For more information, see section Action Scripts. |
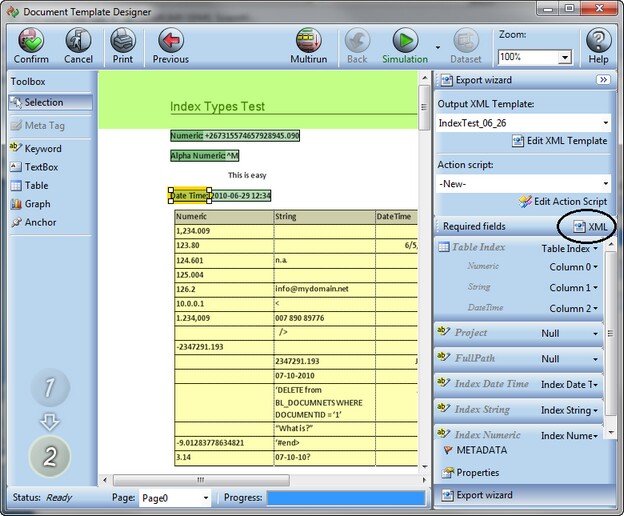
| 3. | Next, specify for each field the value associated with it by selecting the object from a list. For example, bind the columns in the XML with objects in the document in order to generate output XML. |
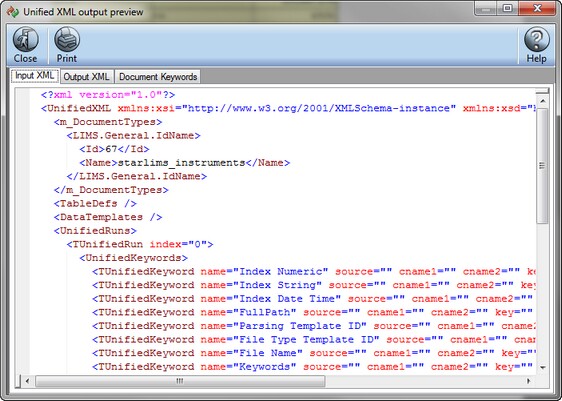
| 4. | Click on the XML button to view the XML code generated for the document. Use the Document Keywords tab to view keywords detected by the system. Use the Close button to exit the preview mode. |
| 5. | After the Unified XML mapping is ready, click the Simulation button to verify that the template created is correct and all changes made to it were accepted. The simulation displays the scenario of how the data extraction rules will be applied to new documents of the same type. |
| 6. | Use the METADATA tab to display fields and their values from the document. Click the Add button to manually add additional metadata fields. |
| 7. | Use the Properties tab to display descriptions and controls for selected objects. |
| 8. | After you test your template using simulation, you can click the Dataset button to extract data using CCXML format; the Dataset Visualizer window appears. In this window, you can select the data fields that you would like to present in a table format from all the metadata you defined in your template. For detailed information about this window, see section Simulating Message Translation. |
| 9. | Click on the Confirm button. In the input window that appears, enter DRP Name, FRP name, and click Save. The confirmed document appears as complete (green icon) in the Recognition Queue application. This ensures that the next upload of the similar document will be recognized by the system and the created DRP template will be applied to it. The file at this point is classified as a training file. |
![]() TIP After closing the Document Template Designer window, you can review the output XML by selecting the file and clicking on the Unified XML link.
TIP After closing the Document Template Designer window, you can review the output XML by selecting the file and clicking on the Unified XML link.